How To Organize Your Design Files
/I will be the first to admit that while I am a very clean person, I'm not always the most organized. So, I have to make sure to take extra time every now and then to come with organization tactics that work for me, especially when it comes to my design work, because I want my work flow to be as easy as possible. In college I definitely had no idea how to organize my files correctly, and it made it very difficult when it came to finding the files I needed. But through working for various companies and seeing how they organized their files, I have combined their methods to create one that works for me, which I use for my freelance and personal designs. If you would like to see my structure, keep reading, and hopefully I can help you figure out your best way to organize your files as well!
Before you read on, make sure to click here to download my free organization map, which you can keep on your desktop to help your organizing go faster!
To start, I have one folder in my documents (that I always back up onto an external hard drive) that I keep all of my freelance projects in. I make a new folder for each year, and store all previous years onto my external hard drives to keep space open on my laptop. To keep previous clients' information private, I will be using fake clients in the images below, but will be using the same system I use for the real ones.
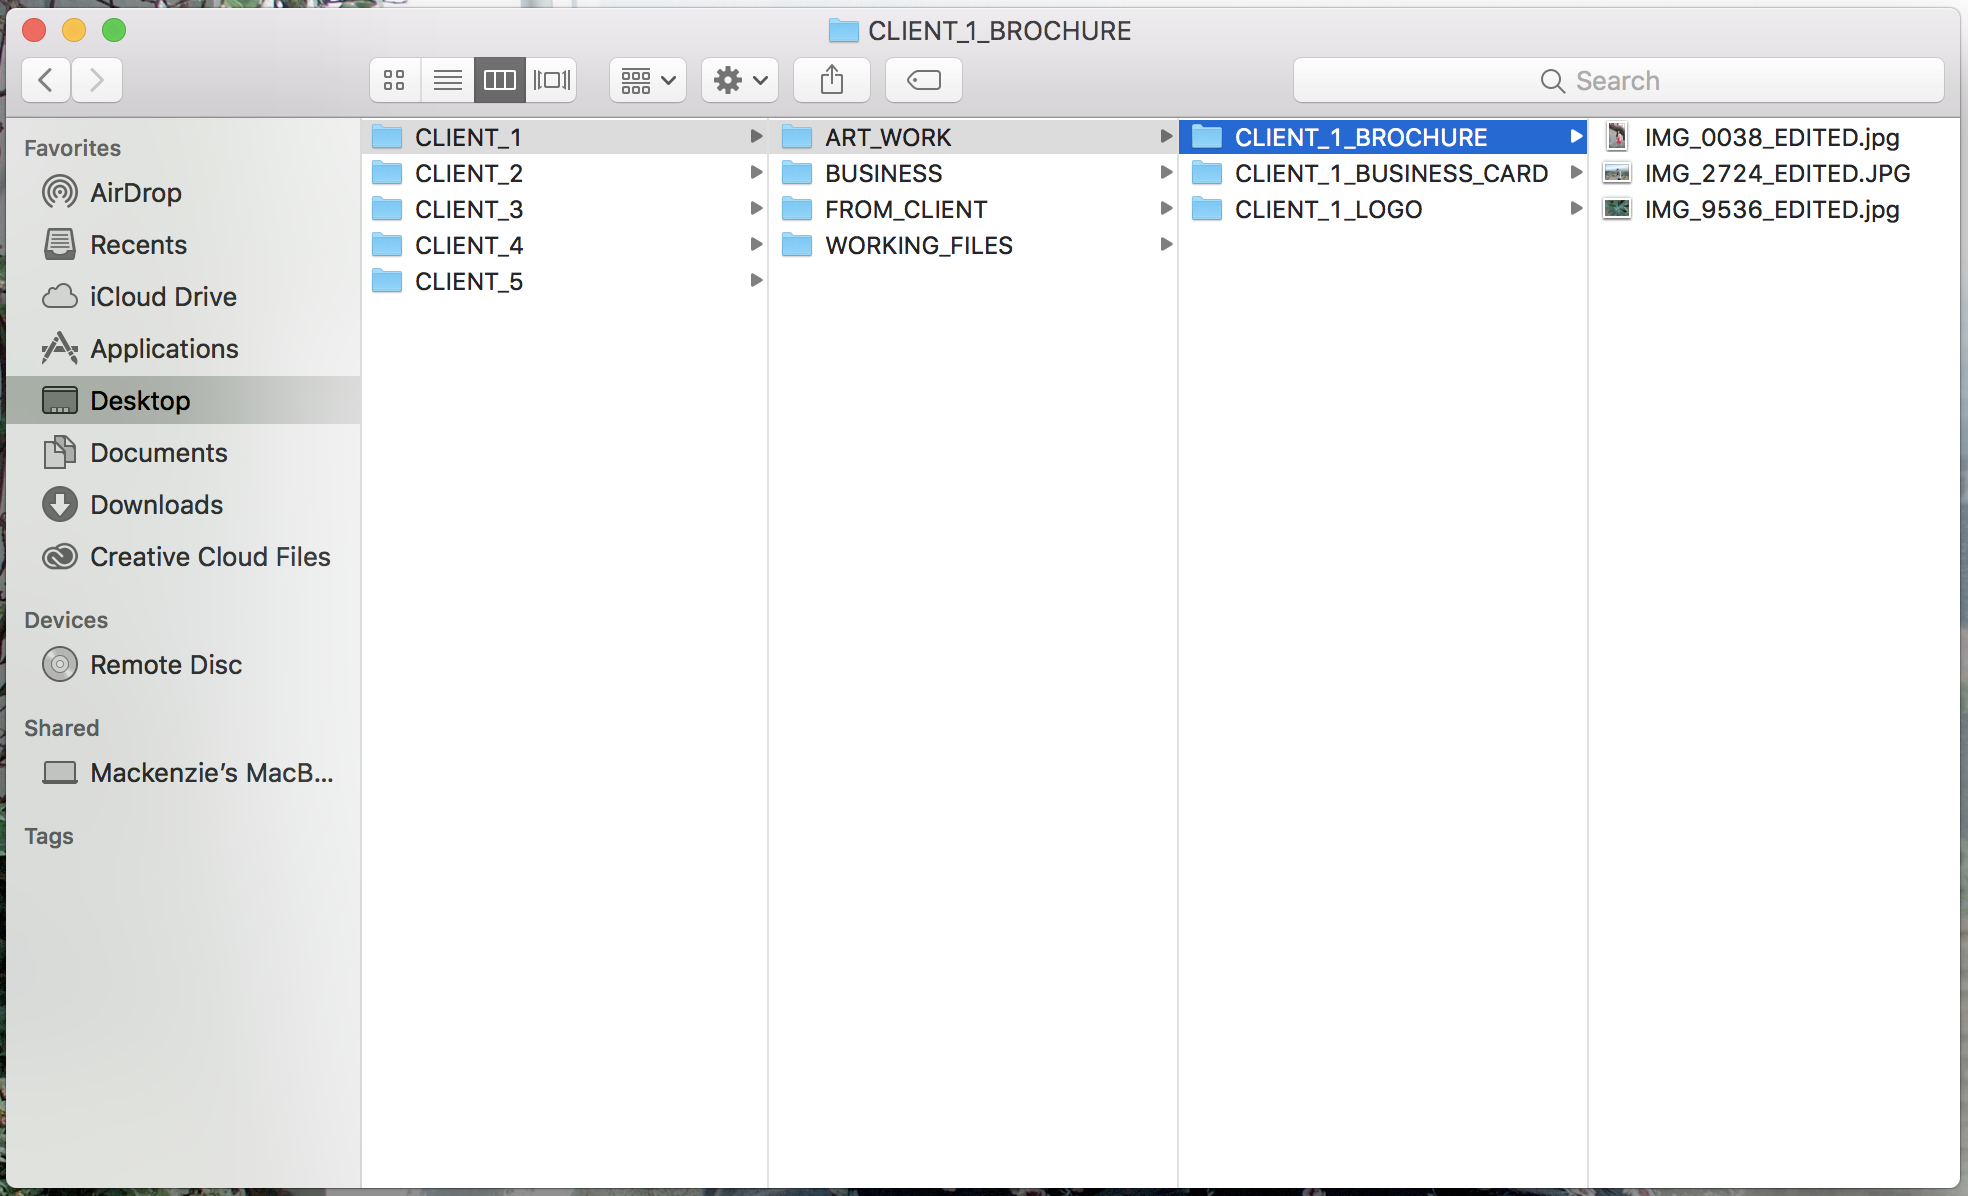
This is the easy step. The tricky part is how to sort out all of your files for each client. So for Client 1, I will be showing you a simple scenario. This client will only have three projects they need done, and that is all they need. I would begin their folder like the image below, setting up four different folders: Art Work, Business, From Client, and Working Files.
The Art Work folder will hold any art that I am editing to go into the final file. For example, let's say I am making a brochure, and the client sends me some unedited photos that I will be editing myself. My final edited files that are linked to the InDesign file would go into this folder. In Business, I would put anything from the client or for myself that I may need but does not have anything to do with the designs. Such as billing information, invoices, time sheets, etc. Next is the From Client folder. This is the folder where I store any design files from the client just as they gave them to me, in case I ever need to go back to an original file. I also store any copy from the client in here. And last, but most important is the Working Files folder, which holds the actual file the project is being made in. So if you are following along, this should be what your next screen should look like:
Now each of these folders will be set up a little differently, so I will go through them one at a time. First is the Working Files folder, which is sorted into the different projects I am working on for the client. Now for the working files, I always keep multiple versions, in case I ever need to go back to something. So for example my first version of the brochure that I would show to the client will be labeled V1. Then if they come back with changes, the next version I send them will be labeled V2. Then I label the final version that goes to print VFinal. Now I only do this with major changes, because I don't need to have twenty versions of the same project (nor do I have the storage space), but it is good to have the most dramatic changes saved as new files in case you ever need to go back.
Art Work is set up the same way, by separating it by project, but it is less complicated. I simply just put whatever edited or worked on art I am using in here, and always re-label it as edited so I don't save over the original file.
Lastly are the Business and From Client folders, which I organize the same way. Any time the client sends me something, I make a folder with the date on it, and label it what the asset is I have received, and place the file into the folder. You can see what I mean below. This way I know when I received the asset, and everything is easy to find when I need it. However, I never change any files in these folders, or link directly out of them, I always copy everything into the Art Work folder. This way I know I always have the original files saved somewhere I can easily find them.
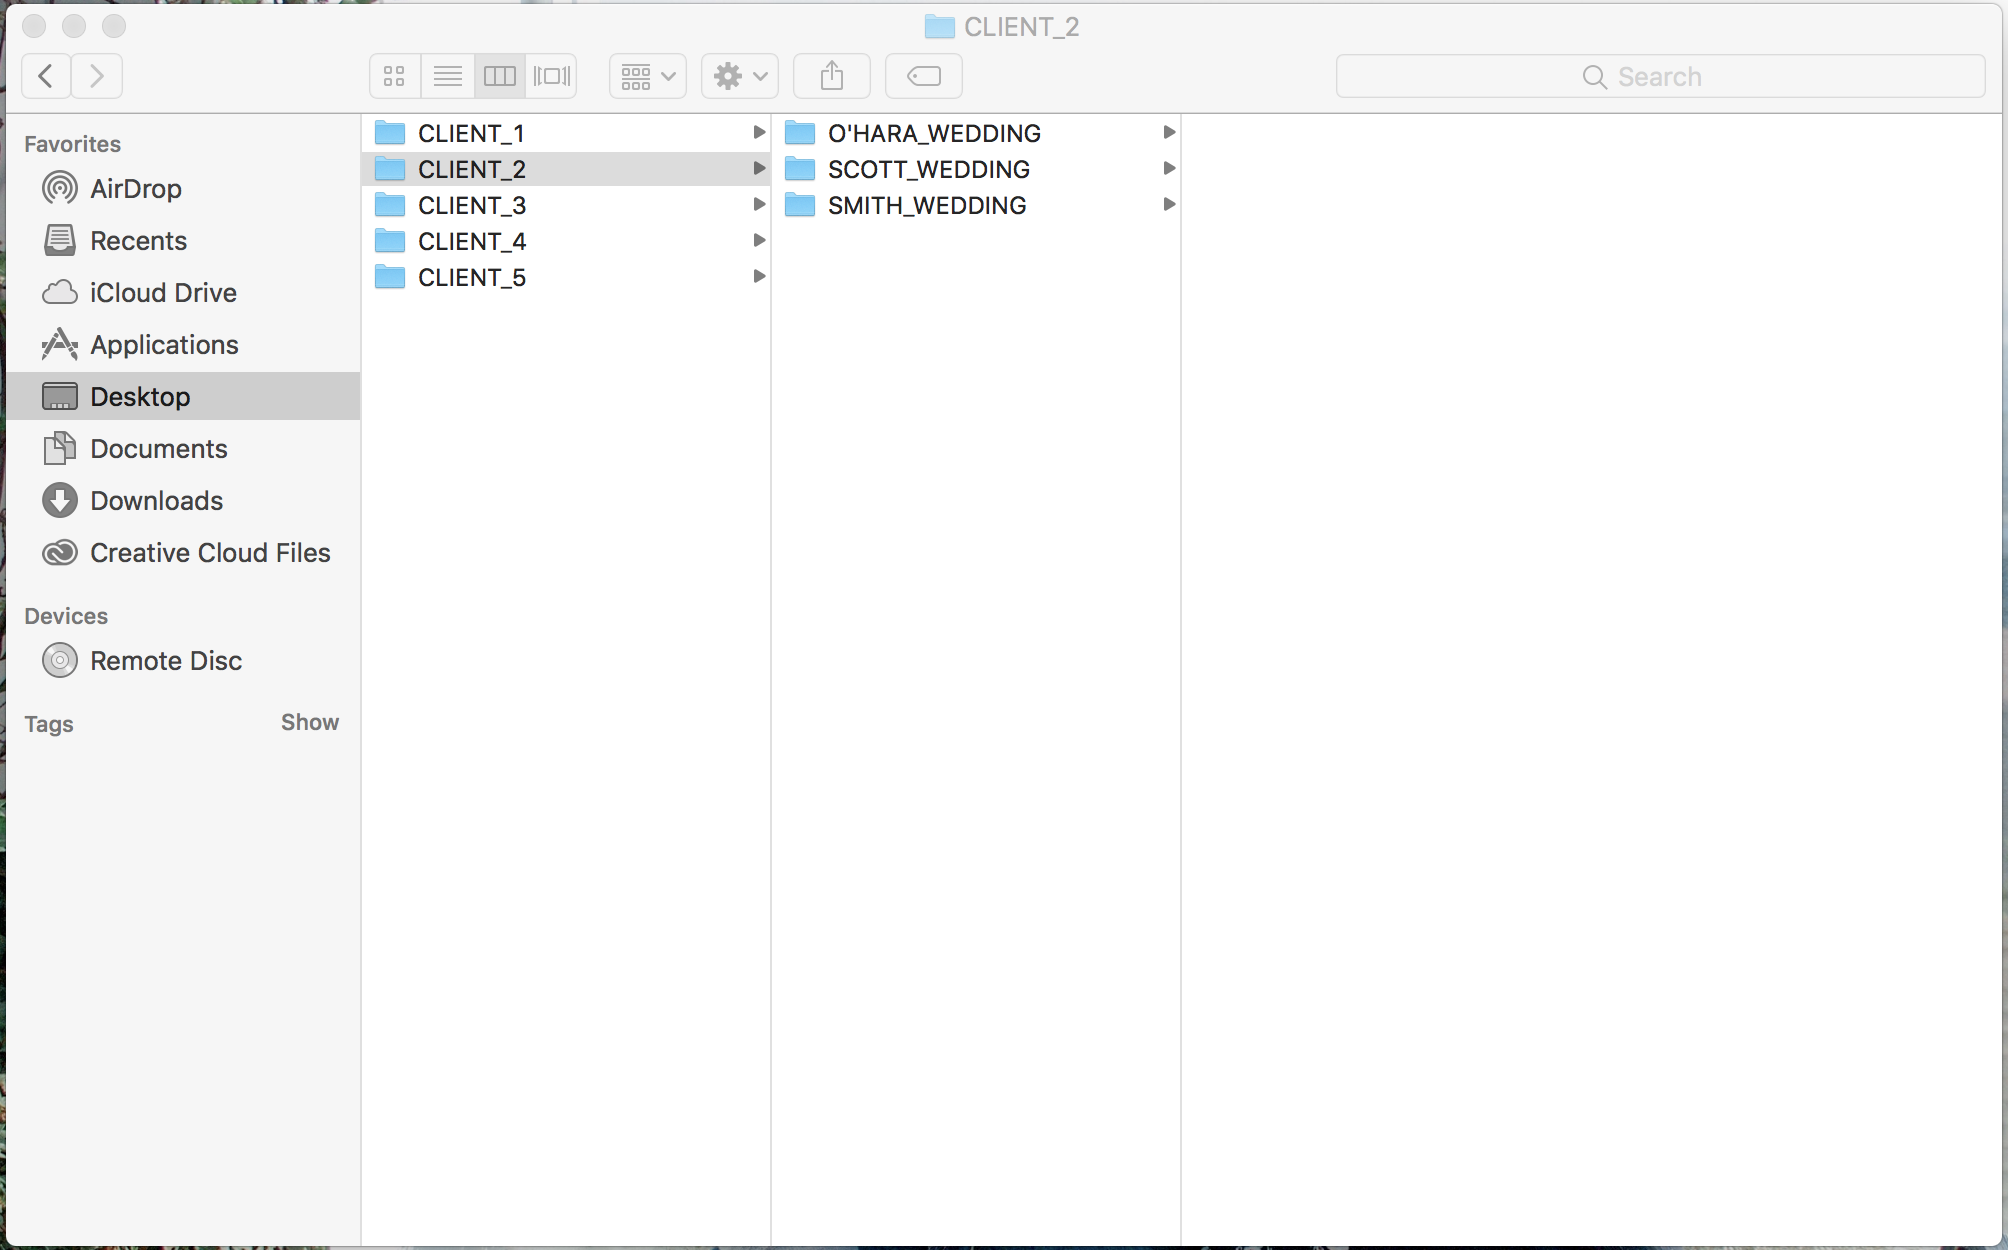
Okay, now I will show you what I do when I have multiple clients under one client. For example, let's say a wedding planner likes my work, and wants to hire me to do some designs for three different weddings she has coming up. I would separate this folder by making a folder for each wedding party.
Then under each wedding party, would be the same set up as before. So it is really just adding one extra step, but this way, each wedding is treated like it's own client, under one big client.
And that is it! I know it may look a little complicated, but it is a pretty simple system once you apply your own files to it. Now this is by no means the only way to organize your files, it is just what works best for me. If you try this method, I hope it will help make your designing process go smoother, or at least help you get started designing your own system! If you try it and like it, or find any of this helpful, let me know in the comments below!
And make sure to download my free organization guide by clicking the button below!


