How to Create Your Own GIF
/Have you ever had the perfect line from a movie or TV show that you wanted to send a GIF of to a friend but couldn't find it anywhere? Or maybe you just want to learn a new form of design that has been sweeping the internet. Either way if you want to learn how to make your own GIF, you have come to the right place! You don't need to be a graphic designer or a computer wiz to make them, and it only takes a few easy steps.
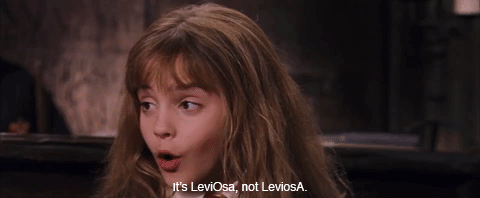
In this post, I'm going to take you through the steps I took to make this GIF below.
Making the actual gif is very easy - I use this website GIPHY.com. All you have to do is find find a clip of the scene you want to GIF on Youtube or Vimeo, you can simply enter the URL into the field show below. Or you can upload your own video of whatever you want to GIF as well!

Once you enter a URL, you will be taken to this screen where you can pick the exact frames that will be included in your GIF. You can use the two bars as shown below to determine how long and what part of the clip you want to use.

You will then be taken to this screen where you can add text and filters. I personally skip past this page, because I like to add these things in Photoshop (which I will explain below), but if you don't have access to Photoshop, or don't often use it, this is also a fine option to add details to your GIF. I just prefer Photoshop because it offers more selections and tools.

Next you will be taken to this screen, where you can add tags if you want your GIF to be able to be found on the site for others to use. I usually skip this step, because mine are not finished yet, but feel free if you choose to! Then just hit upload.

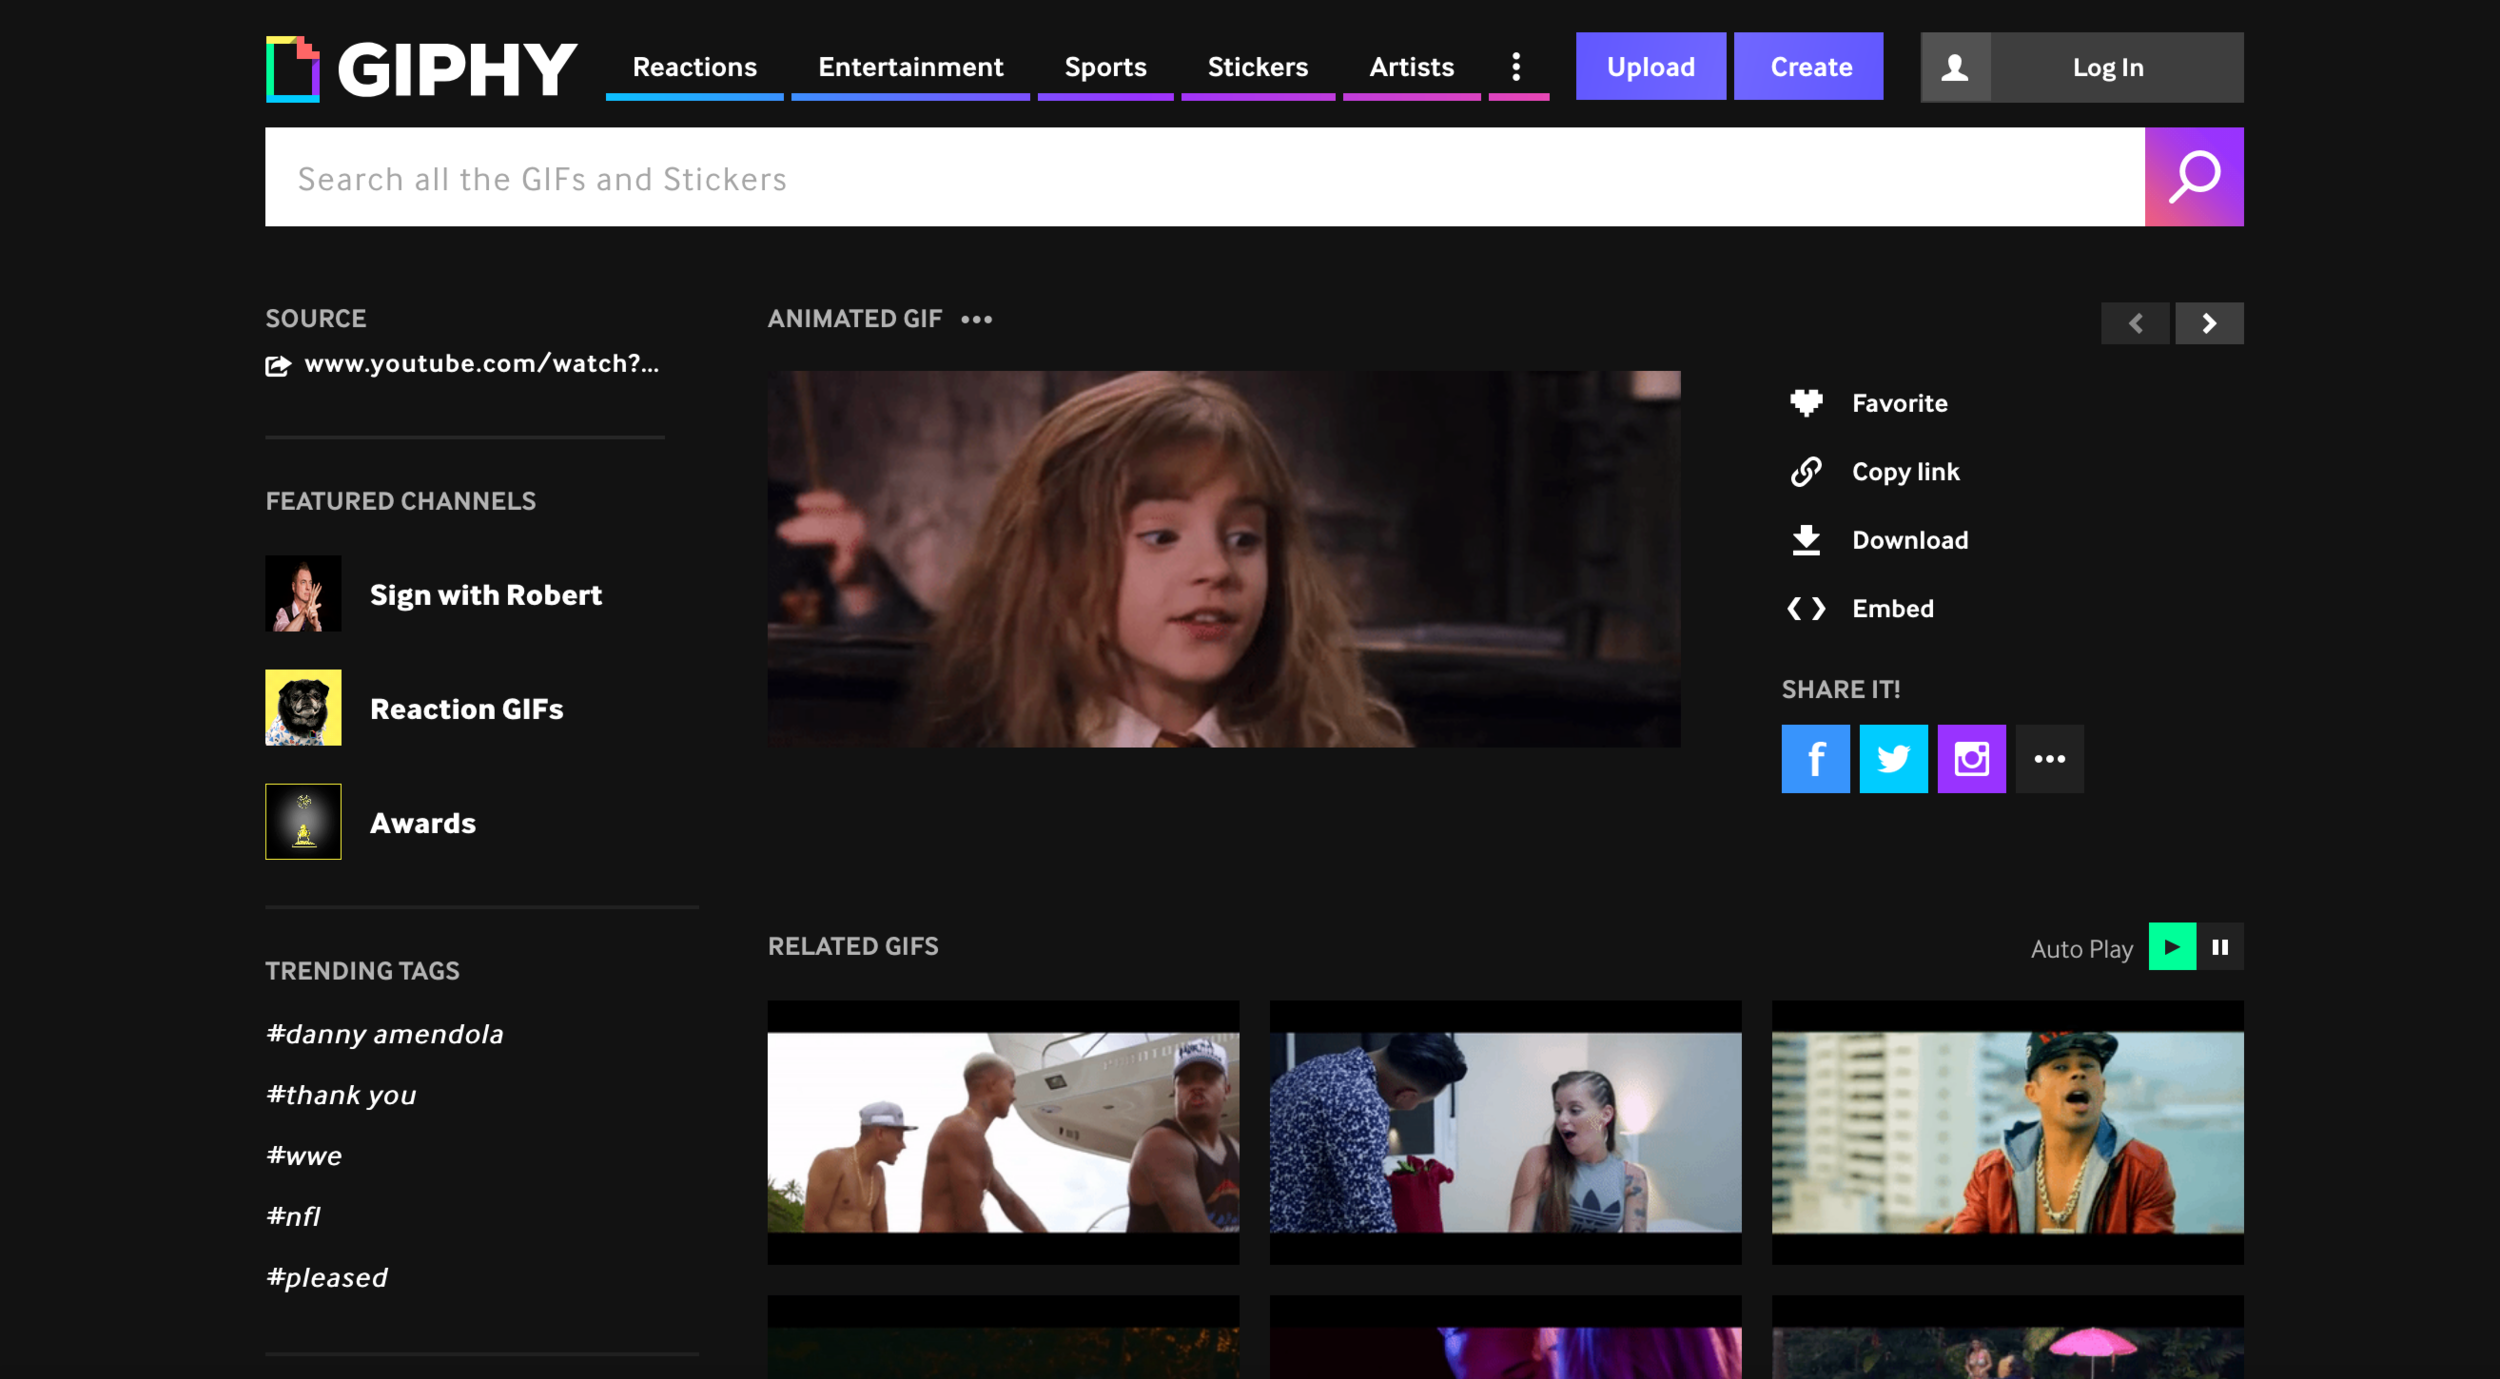
Once you upload your GIF, you will be taken to this page where you can download and share it on social media. If you used the tools on the site, and are happy with the way it turned out, then you are done! However, if you want to continue on with learning how to edit the GIF more in Photoshop, make sure you download it to your computer for these next steps.
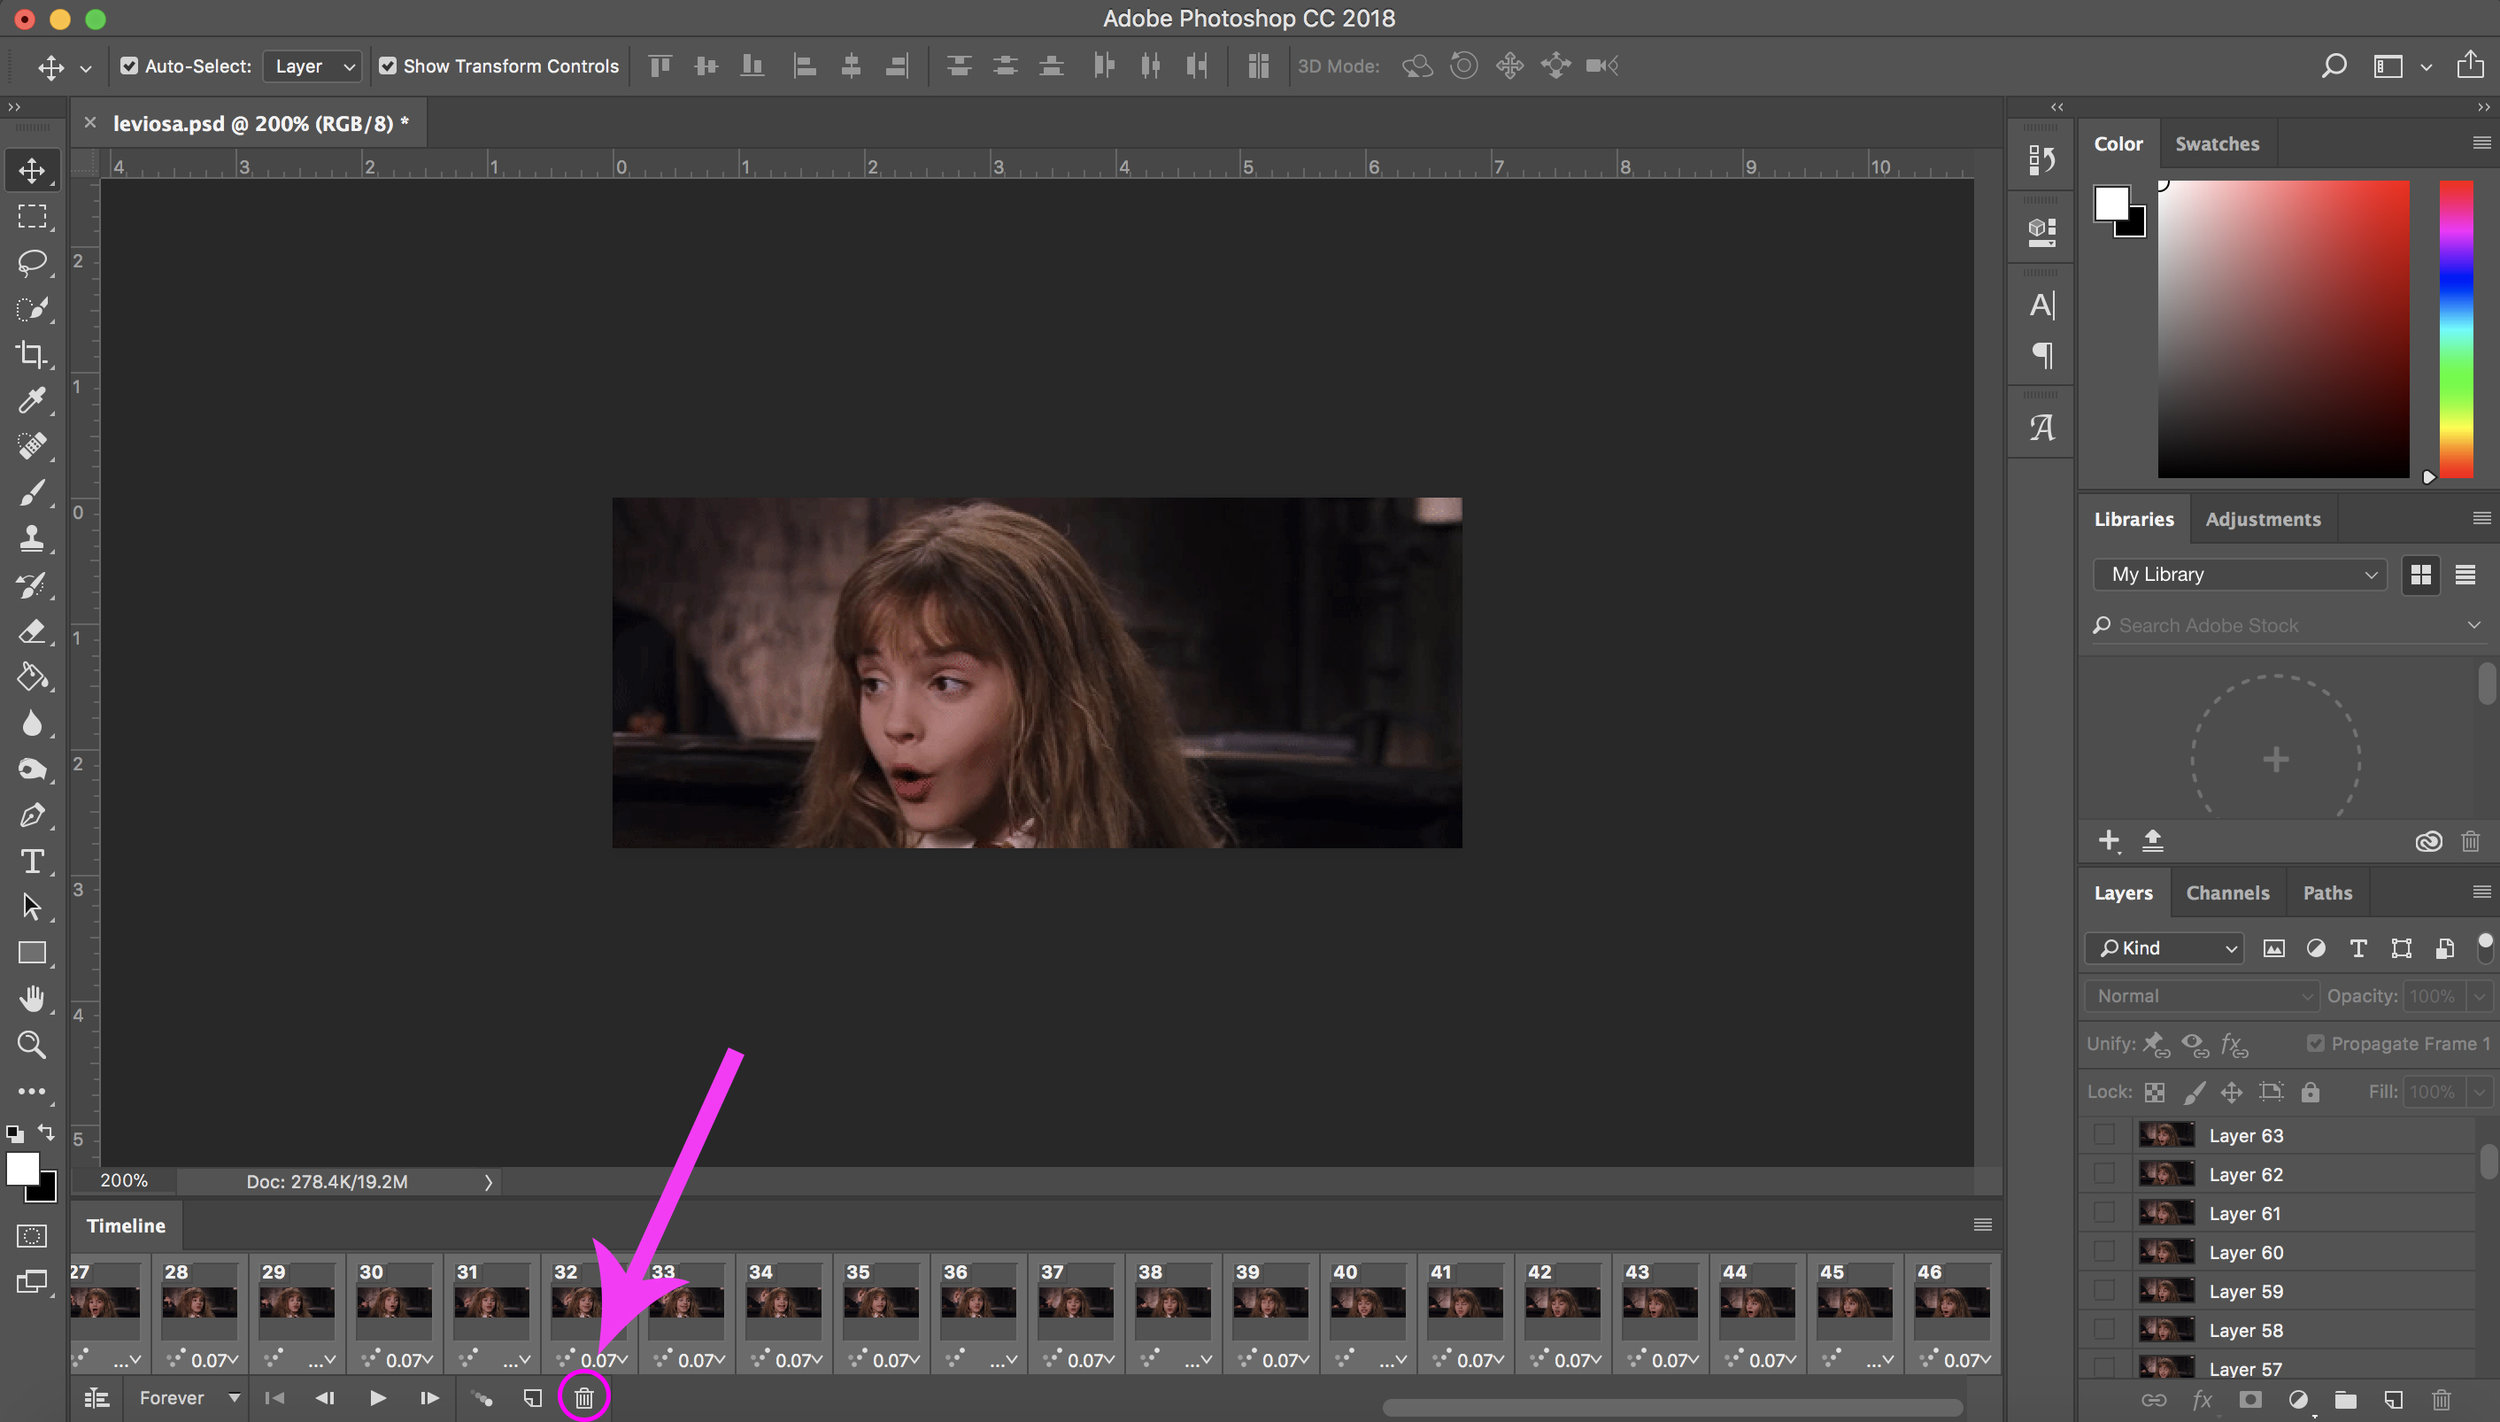
Once you have downloaded the GIF, simply drag it into Photoshop, and make sure to turn on the Timeline feature under the Window tab. You will have the view like I do below. The first thing I usually do is get rid of any unwanted frames. Sometimes with the GIF maker website you might still not be able to get only the exact frames in the GIF that you want. So if there is an extra frame or two in there I don't want I get rid of them first by clicking on them, then hitting the trash can under the timeline. I will then select all of the remaining frames by clicking on the first frame, holding Shift, and then selecting the last frame (Note: this step is very important going forward, because if you don't select all of the frames, any changes you make will only be applied to one frame).
Next if I want to make any edits to the actual image, such as brightening it, I will do that with all the frames selected. This image was bright enough to me already, and I didn't want it to loose too much of it's color, so I left it alone. But, this can be done by clicking the little half moon on the bottom of the layers window, and choosing Brightness/Contrast.

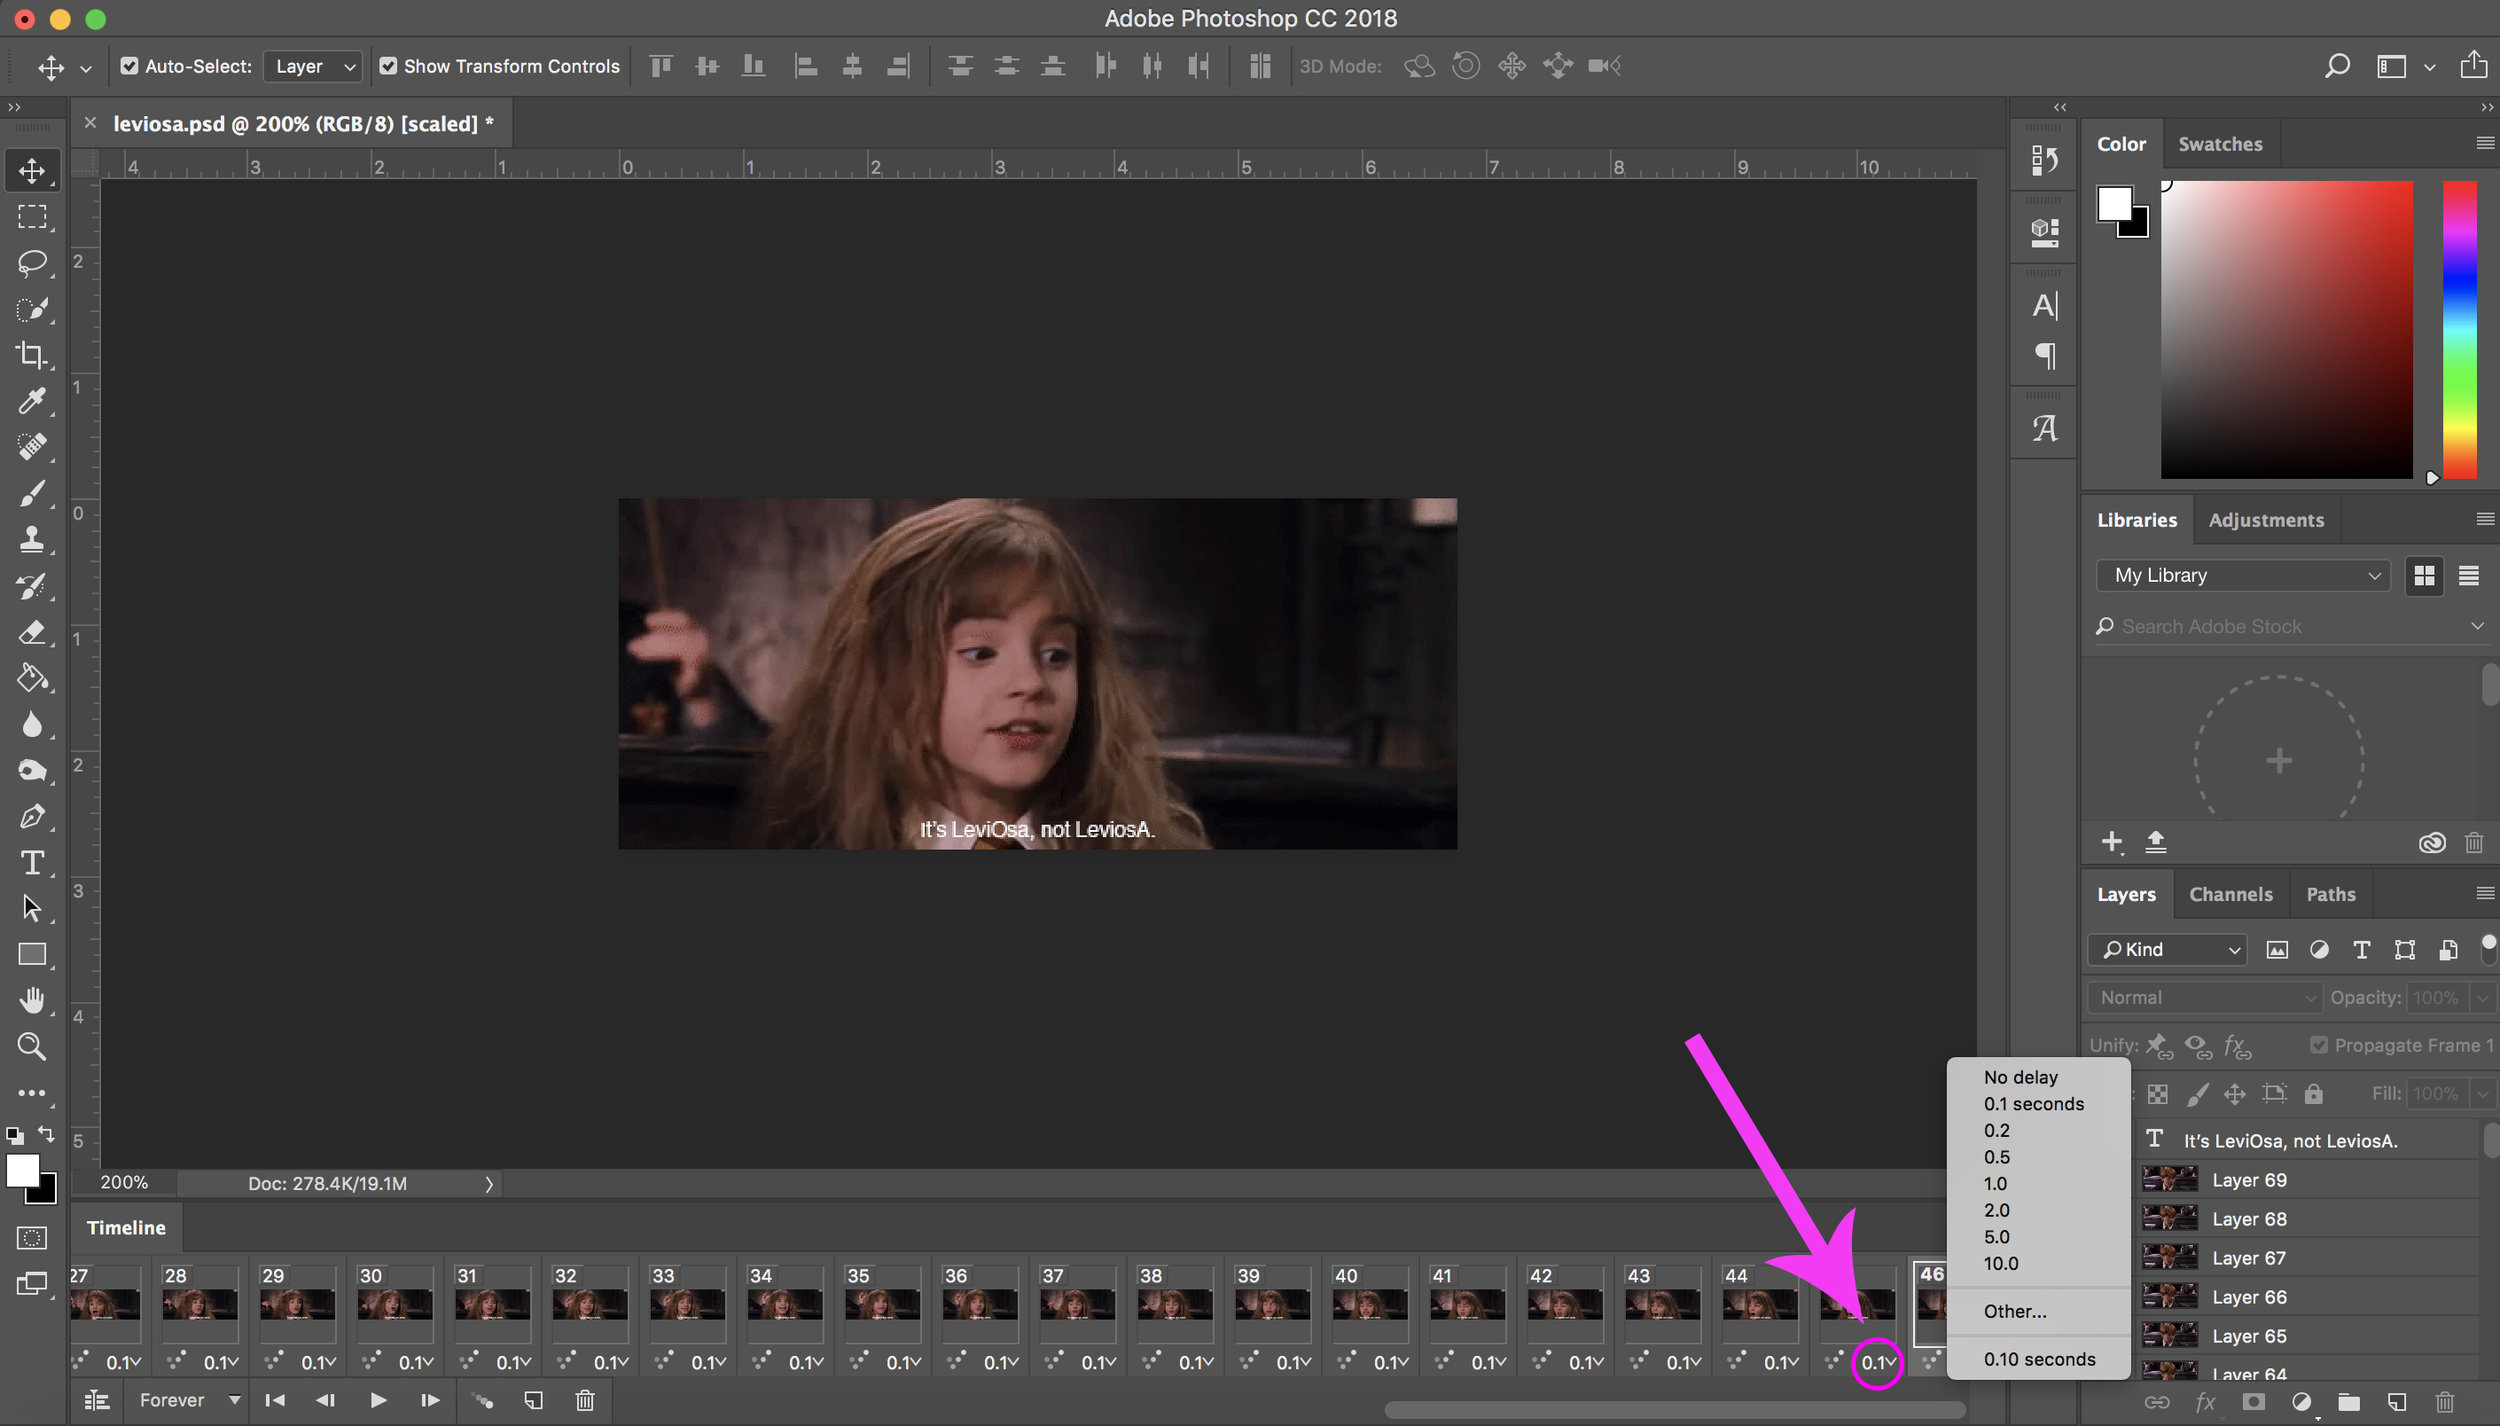
Next after making any necessary edits to the GIF, I add text. To do this, keep everything selected, but make a new layer, that will go above all of the frame layers in the layers panel. Then select the text tool on the left, and type out whatever phrase you desire onto the GIF, and position it, color it, and choose whatever font you think suites the design best.

Then to test the GIF, simply push the little play button under your timeline. Now usually the automatic settings the timeline gives it will make it a little slower than I like, so to fix this, with all of the frames still selected, simply click the bottom right corner of any of them and make the seconds per frame faster. I usually go with .1 seconds or less.
Once you are happy with your GIF, make sure you save it as a Photoshop file first in case you ever want to make any edits to it. Then select File, and the Save for Web option under Export. A new window like this will open, all you need to do is change the file type from JPEG to GIF, and hit save.

And that's it! Super easy. Make sure to let me know if this tutorial was helpful in the comments below, and I hope you have fun creating your own GIFs!
If you enjoyed this post, and want to see more like it, make sure to give it a like below!